2-1. redux-thunk
리덕스를 사용하는 어플리케이션에서 비동기 작업을 처리 할 때 가장 기본적인 방법으로는 redux-thunk 라는 미들웨어를 사용하는것입니다. 이 미들웨어는 리덕스를 개발한 Dan Abramov 가 만든 것이며, redux 공식 매뉴얼에서도 이 미들웨어를 사용하여 비동기 작업을 다룹니다. 이를 사용하여 비동기 작업을 관리하는건 매우 직관적이고 간단합니다.
thunk 란?
thunk란, 특정 작업을 나중에 하도록 미루기 위해서 함수형태로 감싼것을 칭합니다.
예를 들어서 여러분들이 1 + 2를 지금 당장 하고싶다면 이렇게 하겠죠?
const x = 1 + 2;
이 코드가 실행되면 1 + 2 의 연산이 바로 진행됩니다.
하지만 다음과 같이 하면 어떨까요?
const foo = () => 1 + 2;
이렇게 하면, 1 + 2 의 연산이 코드가 실행 될 때 바로 이뤄지지 않고 나중에 foo() 가 호출 되어야만 이뤄집니다.
redux-thunk 는 뭘 하는 미들웨어일까?
가장 간단히 설명하자면, 이 미들웨어는 객체 대신 함수를 생성하는 액션 생성함수를 작성 할 수 있게 해줍니다. 리덕스에서는 기본적으로는 액션 객체를 디스패치합니다. 일반 액션 생성자는, 다음과 같이 파라미터를 가지고 액션 객체를 생성하는 작업만합니다:
const actionCreator = (payload) => ({action: 'ACTION', payload});
만약에 특정 액션이 몇초뒤에 실행되게 하거나, 현재 상태에 따라 아예 액션이 무시되게 하려면, 일반 액션 생성자로는 할 수가 없습니다. 하지만, redux-thunk 는 이를 가능케합니다.
우선 1초뒤 액션이 디스패치되게 하는 예제코드를 살펴보겠습니다:
const INCREMENT_COUNTER = 'INCREMENT_COUNTER';

function increment() {
  return {
    type: INCREMENT_COUNTER
  };
}

function incrementAsync() {
  return dispatch => { // dispatch 를 파라미터로 가지는 함수를 리턴합니다.
    setTimeout(() => {
      // 1 초뒤 dispatch 합니다
      dispatch(increment());
    }, 1000);
  };
}
이렇게 한다면 나중에 store.dispatch(incrementAsync()); 를 하면 INCREMENT_COUNTER 액션이 1초뒤에 디스패치됩니다.
이번엔 조건에 따라 액션을 디스패치하거나 무시하는 코드를 살펴봅시다:
function incrementIfOdd() {
  return (dispatch, getState) => {
    const { counter } = getState();

    if (counter % 2 === 0) {
      return;
    }

    dispatch(increment());
  };
}
만약에, 리턴하는 함수에서 dispatch, getState 를 파라미터로 받게 한다면 스토어의 상태에도 접근 할 수있습니다. 따라서, 현재의 스토어 상태의 값에 따라 액션이 dispatch 될 지 무시될지 정해줄 수 있는것이죠.
간단하게 정리를 하자면 redux-thunk 는 일반 액션 생성자에 날개를 달아줍니다. 보통의 액션생성자는 그냥 하나의 액션객체를 생성 할 뿐이지만 redux-thunk 를 통해 만든 액션생성자는 그 내부에서 여러가지 작업을 할 수 있습니다. 이 곳에서 네트워크 요청을 해도 무방하죠. 또한, 이 안에서 액션을 여러번 디스패치 할 수도 있습니다.
여기서 dispatch, getState 는 어디서 오는건가요?
간단합니다. redux-thunk 미들웨어에서, 전달받은 액션이 함수 형태 일 때, 그 함수에 dispatch 와 getState 를 넣어서 실행해줍니다.
실제로, redux-thunk 의 코드는 정말로 간단합니다. 한번 코드를 보는게 작동방식을 이해는데에 도움이 될거예요.
function createThunkMiddleware(extraArgument) {
  return ({ dispatch, getState }) => next => action => {
    if (typeof action === 'function') {
      return action(dispatch, getState, extraArgument);
    }

    return next(action);
  };
}

const thunk = createThunkMiddleware();
thunk.withExtraArgument = createThunkMiddleware;

export default thunk;
설치와 적용
자, 그러면 redux-thunk 를 사용해봅시다.
우선 설치를 해주세요
$ yarn add redux-thunk
그 다음엔, 스토어를 생성 할 때 미들웨어를 적용하세요
src/store.js
import { createStore, applyMiddleware } from 'redux';
import modules from './modules';

import { createLogger } from 'redux-logger';
import ReduxThunk from 'redux-thunk';

/* 로그 미들웨어를 생성 할 때 설정을 커스터마이징 할 수 있습니다.
   https://github.com/evgenyrodionov/redux-logger#options
*/
const logger = createLogger();

const store = createStore(modules, applyMiddleware(logger, ReduxThunk))

export default store;
카운터를 비동기적으로 만들어보기
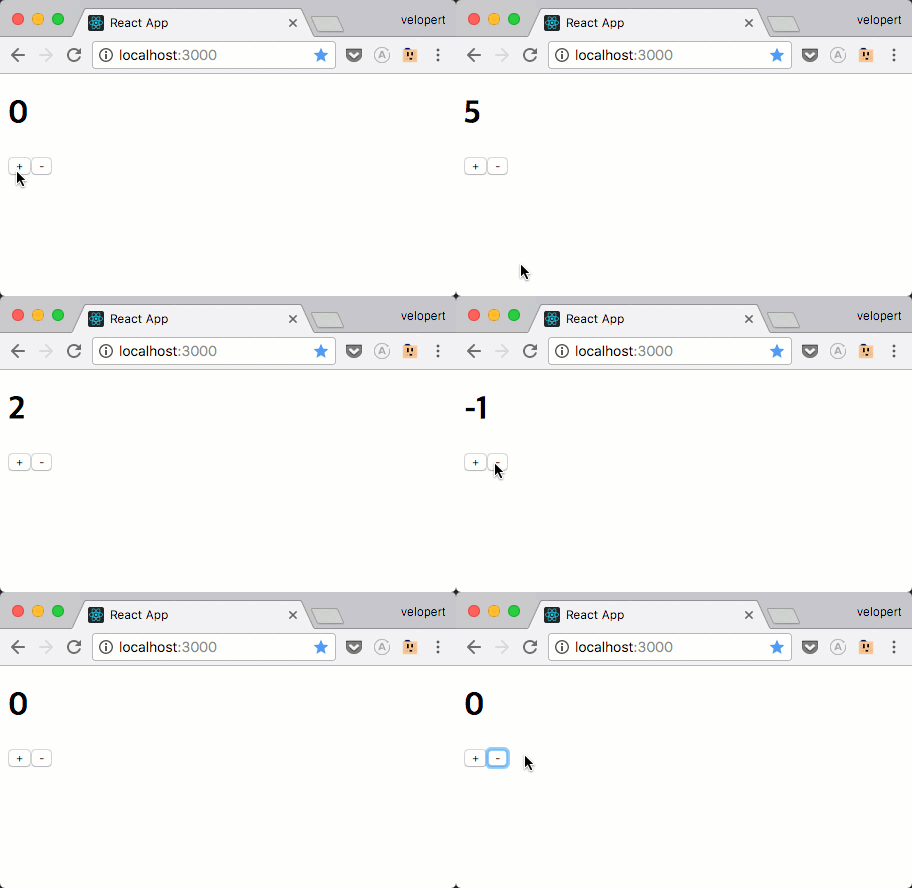
자, 그러면 기존에 작동하던 카운터를 비동기적으로 작동하도록 코드를 추가해보겠습니다. 카운터 모듈을 다음과 같이 수정하세요
src/modules/counter.js
import { handleActions, createAction } from 'redux-actions';

const INCREMENT = 'INCREMENT';
const DECREMENT = 'DECREMENT';

export const increment = createAction(INCREMENT);
export const decrement = createAction(DECREMENT);


export const incrementAsync = () => dispatch => {
    // 1초 뒤 액션 디스패치
    setTimeout(
        () => { dispatch(increment()) },
        1000
    );
}

export const decrementAsync = () => dispatch => {
    // 1초 뒤 액션 디스패치
    setTimeout(
        () => { dispatch(decrement()) },
        1000
    );
}

export default handleActions({
    [INCREMENT]: (state, action) => state + 1,
    [DECREMENT]: (state, action) => state - 1
}, 0);
그 다음에는, App 컴포넌트에서 increment -> incrementAsync, decrement -> decrementAsync 로 치환하세요.
import React, { Component } from 'react';
import { bindActionCreators } from 'redux';
import { connect } from 'react-redux';
import * as counterActions from './modules/counter';


class App extends Component {
    render() {
        const { CounterActions, number } = this.props;

        return (
            <div>
                <h1>{number}</h1>
                <button onClick={CounterActions.incrementAsync}>+</button>
                <button onClick={CounterActions.decrementAsync}>-</button>
            </div>
        );
    }
}

export default connect(
    (state) => ({
        number: state.counter
    }),
    (dispatch) => ({
        CounterActions: bindActionCreators(counterActions, dispatch)
    })
)(App);
자, 이제 카운터가 어떻게 작동하는지 확인해볼까요?

다음 섹션에서는 redux-thunk 를 사용하여 웹 요청을 처리하는 방법을 배워보겠습니다.