3-4. 메모 작성하기
이번 섹션에서는 메모 작성 기능을 구현하겠습니다.
작업을 시작하기전에 먼저 레이아웃을 작업 할 때 임시로 회색 배경으로 설정했던것을 지우세요.
src/components/Layout.js - Layout.Main
Layout.Main = styled.div`
    margin: 0 auto;
    margin-top: 2rem;
    width: 1200px;
    transition: all .3s;
    position: relative;

    ${media.desktop`
        width: 990px;
    `}

    (...)
`
메모를 작성하기 위하여 4개의 프리젠테이셔널 컴포넌트와 한개의 컨테이너 컴포넌트를 만들도록 하겠습니다.
프리젠테이셔널 컴포넌트:
- WhiteBox 그림자가 있는 흰색 박스입니다.
- InputPlaceholder 흰색 박스를 클릭하기전, "메모를 입력하세요.." 를 띄우는 컴포넌트 입니다.
- InputSet input 과 textarea 가 함께 있는 세트입니다.
- SaveButton 오른쪽에 정렬된 완료 버튼 입니다.
InputSet 과 SaveButton 은 추후 메모 수정을 할 때도 재사용됩니다. 이 컴포넌트들은 src/components/Shared/ 경로에 저장하도록 하겠습니다.
메모를 작성할 때에만 사용되는 프리젠테이셔널 컴포넌트 WhiteBox 와 InputPlaceholder 는 src/components/WriteMemo/ 경로에 저장하겠습니다.
컨테이너 컴포넌트
- WriteMemo 리덕스와 상태를 연동하여 작성 기능이 작동하게 해주는 컴포넌트입니다.
WhiteBox 컴포넌트 만들기
메모 작성 컴포넌트의 틀이 될 WhiteBox 컴포넌트를 만들어보겠습니다. 이 컴포넌트는 특별한 기능을 하지는 않고 그냥 보여주는 용도이며, 화면 사이즈에 따라 너비가 조정됩니다.
src/components/WriteMemo/WhiteBox.js
import styled from 'styled-components';
import oc from 'open-color';
import { media } from 'lib/style-utils';

const WhiteBox = styled.div`
    width: 700px;
    margin: 0 auto;
    padding: 1rem;

    background: white;
    color: ${oc.gray[6]};
    box-shadow: 0 1px 3px rgba(0,0,0,0.12), 0 1px 2px rgba(0,0,0,0.24);
    transition: all 0.3s cubic-bezier(.25,.8,.25,1);

    cursor: text;

    &:hover {
        box-shadow: 0 10px 20px rgba(0,0,0,0.19), 0 6px 6px rgba(0,0,0,0.23);
    }

    ${media.desktop`
        width: 500px;
    `}

    ${media.tablet`
        width: 100%;
    `}
`;

export default WhiteBox;
InputPlaceholder 컴포넌트 만들기
이 컴포넌트 또한 특별한 기능은 없는 보여주기만 할 컴포넌트입니다.
src/components/WriteMemo/InputPlaceholder.js
import React from 'react';
import styled from 'styled-components';

const Wrapper = styled.div`
    font-weight: 300;
    font-size: 1.2rem;
`;

const InputPlaceholder = () => (
    <Wrapper>
        메모를 입력하세요...
    </Wrapper>
);

export default InputPlaceholder;
컴포넌트 인덱스 파일 만들기
우리가 방금 만든 컴포넌트를 불러올땐 보통 다음처럼 해야겠죠?
import InputPlaceholder from 'components/WriteMemo/InputPlaceholder';
import WhiteBox from 'components/WriteMemo/WhiteBox';
하지만 이것보다 조금 편리하게 불러오는 방법이 있습니다. 바로 인덱스파일을 만드는건데요. 인덱스파일을 만들고나면 다음과 같이 불러올 수 있게 됩니다:
import { InputPlaceholder, WhiteBox } from 'components/WriteMemo';
어때요? 한 디렉토리에 여러개의 컴포넌트가 들어있다면 이렇게 작성하는편이 가독성도 높고 편하겠죠?
자 그러면 인덱스 파일을 작성하는 방법을 배워보겠습니다.
원리는 간단합니다. 그냥 불러온다음에 내보내면 됩니다.
src/components/WriteMemo/index.js
import InputPlaceholder from './InputPlaceholder';
import WhiteBox from './WhiteBox';

export {
    InputPlaceholder,
    WhiteBox
}
이렇게 하셔도 되고, 아니면 다음과 같이 해도 됩니다.
src/components/WriteMemo/index.js
export { default as InputPlaceholder } from './InputPlaceholder';
export { default as WhiteBox } from './WhiteBox';
두번째 방식이 코드가 훨씬 짧죠? 하지만, 이 방식이 익숙하지 않다면 작성 할 때마다 조금씩 헷갈릴 수 있습니다. 그럴땐 에디터에서 코드조각으로 추가해두면 유용합니다.
다음은 VSCode 형식의 코드조각입니다.
code snippet
    "Re-export module as": {
        "prefix": "rexp",
        "body": [
            "export { default as $1 } from './$1';"
        ],
        "description": "Re-exports the ES6 module"
    },
이렇게 추가해두고 나면 rexp 키워드로 코드를 간편하게 입력할 수 있게 되죠.
WriteMemo 컨테이너 컴포넌트 준비하기
아직 본격적으로 WriteMemo 컴포넌트를 구현할 것은 아니지만, 기존에 우리가 만든 프리젠테이셔널 컴포넌트들이 제대로 보여지는지 확인하기 위하여 미리 만들어서 렌더링을 시도해보겠습니다.
다음과 같이, 방금 만든 컴포넌트를 불러와서 WhiteBox 안에 InputPlaceholder 를 넣으세요.
src/containers/WriteMemo.js
import React, { Component } from 'react';
import { InputPlaceholder, WhiteBox } from 'components/WriteMemo';

class WriteMemo extends Component {
    render() {
        return (
            <WhiteBox>
                <InputPlaceholder/>
            </WhiteBox>
        );
    }
}

export default WriteMemo;
그 다음엔, 이 컴포넌트를 App 컴포넌트에서 렌더링하세요.
src/containers/App.js
import React, { Component } from 'react';
import Header from 'components/Header';
import Layout from 'components/Layout';
import WriteMemo from './WriteMemo';

class App extends Component {
    render() {
        return (
            <Layout>
                <Header/>
                <Layout.Main>
                    <WriteMemo/>
                </Layout.Main>
            </Layout>
        );
    }
}

export default App;
아직 눌러도 아무 반응 없긴 하지만, 제대로 렌더링됩니다. 커서를 위에 올려보기도 하고, 브라우저 크기를 조절하여 반응형으로 사이즈가 자동으로 잘 조정되는지 확인하세요.
InputSet 컴포넌트 만들기
이 컴포넌트는 제목과 내용을 입력하는 컴포넌트입니다.
ref 를 통하여 컴포넌트가 페이지에 나타나면 제목 인풋에 포커스가 되도록 설정하였습니다.
styled-components 를 사용 할 때에는 ref 를 설정할 때 innerRef 를 사용합니다.
그리고, 내용을 입력하는 textarea 가 내용에 따라 자동으로 높이 조정이 되도록 이전에 설치 한 react-textarea-autosize 를 사용하였습니다.
일반 DOM 엘리먼트가 아닌 컴포넌트를 스타일링 할 때에는 styled(Component) 형식으로 스타일링합니다.
이 컴포넌트는 제목과 내용을 body, title 이라는 props 로 받아오고 이 내용들이 수정되는 함수 onChange 도 받습니다.
src/components/Shared/InputSet.js
import React, { Component } from 'react';
import styled from 'styled-components';
import PropTypes from 'prop-types';
import Textarea from 'react-textarea-autosize';

const TitleInput = styled.input`
    width: 100%;
    border: none;
    outline: none;
    font-weight: 500;
    font-size: 1.25rem;
`;

const StyledTextArea = styled(Textarea)`
    width: 100%;
    width: 100%;
    border: none;
    outline: none;
    font-weight: 300;
    font-size: 1.1rem;
    margin-top: 1rem;
    resize: none;
`

class InputSet extends Component {

    static propTypes = {
        onChange: PropTypes.func,
        title: PropTypes.string,
        body: PropTypes.string
    }

    componentDidMount() {
        // 이 컴포넌트가 화면에 나타나면 제목 인풋에 포커스를 줍니다.
        this.title.focus();
    }

    render() {
        const { onChange, title, body } = this.props;

        return (
            <div>
                <TitleInput
                    name="title"
                    onChange={onChange}
                    placeholder="제목"
                    innerRef={ref=>this.title = ref}
                    value={title}
                />
                <StyledTextArea
                    minRows={3}
                    maxRows={20}
                    placeholder="메모를 입력하세요..."
                    name="body"
                    onChange={onChange}
                    value={body}
                />
            </div>
        );
    }
}

export default InputSet;
SaveButton 컴포넌트
메모 내용을 저장하는 컴포넌트를 만들겠습니다. 이 컴포넌트는 저장하는 함수를 props 로 받아옵니다.
src/components/Shared/SaveButton.js
import styled from 'styled-components';
import oc from 'open-color';
import React from 'react';
import PropTypes from 'prop-types';

const Wrapper = styled.div`
    text-align: right;
`;

const Button = styled.div`
    display: inline-block;
    padding-top: 0.5rem;
    padding-bottom: 0.5rem;
    padding-left: 1rem;
    padding-right: 1rem;
    color: ${oc.indigo[7]};
    border-radius: 4px;
    cursor: pointer;
    font-weight: 500;

    &:hover {
        background: ${oc.gray[1]};
    }
    &:active {
        background: ${oc.gray[2]};
    }
`;

const SaveButton = ({onClick}) => (
    <Wrapper>
        <Button onClick={onClick}>
            완료
        </Button>
    </Wrapper>
);

SaveButton.propTypes = {
    onClick: PropTypes.func
}

export default SaveButton;
Shared 컴포넌트 인덱스 만들기
아까 했던것처럼, 불러오기의 용이성을 위하여 컴포넌트 인덱스를 생성하세요.
src/components/Shared/index.js
export { default as InputSet } from './InputSet';
export { default as SaveButton } from './SaveButton';
렌더링 하기
기존에 렌더링 했던 InputPlaceholder 를 임시로 주석처리하고, 방금 만든 컴포넌트를 렌더링해보세요.
src/containers/WriteMemo.js
import React, { Component } from 'react';
import { InputPlaceholder, WhiteBox } from 'components/WriteMemo';
import { InputSet, SaveButton } from 'components/Shared';

class WriteMemo extends Component {
    render() {
        return (
            <WhiteBox>
                {/*<InputPlaceholder/>*/}
                <InputSet/>
                <SaveButton/>
            </WhiteBox>
        );
    }
}

export default WriteMemo;
잘 렌더링이 되었나요? 그러면 이제 본격적으로 이 컴포넌트의 상태 관리작업에 들어가보도록 하겠습니다.
리덕스 ui 모듈 작성하기
우리의 WriteMemo 컴포넌트는 기본적으론 InputPlaceholder 만 보여주다가, 마우스로 클릭하여 포커스가 되었을때만 InputSet 과 SaveButton 을 보여줍니다. 그리고, 내용이 비어있는 상태에서 컴포넌트 바깥을 클릭하면 다시 InputPlaceholder 만 보여줍니다.
이 기능을 구현하기 위하여 ui 모듈에서 컴포넌트가 포커스되었는지 여부와, 제목, 내용의 상태를 관리하도록 하겠습니다.
이번에 만들 액션들은 다음과 같습니다:
- FOCUS_INPUT: InputSet 컴포넌트에 포커스
- BLUR_INPUT: 포커스 풀림
- CHANGE_INPUT: 제목, 혹은 내용이 수정됨
- RESET_INPUT: 내용을 초기화시킴 (완료를 눌렀을 때 실행됨)
CHANGE_INPUT 을 제외한 액션들은 payload 가 없으므로, 액션 핸들러 함수에서 action 을 파라미터로 받지 않아도 무방합니다.
src/modules/ui.js
import { createAction, handleActions } from 'redux-actions';
import { Map } from 'immutable';

const FOCUS_INPUT = 'ui/write/FOCUS_INPUT';
const BLUR_INPUT = 'ui/write/BLUR_INPUT';
const CHANGE_INPUT = 'ui/write/CHANGE_INPUT';
const RESET_INPUT = 'ui/write/RESET_INPUT';

export const focusInput = createAction(FOCUS_INPUT);
export const blurInput = createAction(BLUR_INPUT);
export const changeInput = createAction(CHANGE_INPUT); // { name, value }
export const resetInput = createAction(RESET_INPUT);

const initialState = Map({
    write: Map({
        focused: false,
        title: '',
        body: ''
    })
});

export default handleActions({
    [FOCUS_INPUT]: (state) => state.setIn(['write', 'focused'], true),
    [BLUR_INPUT]: (state) => state.setIn(['write', 'focused'], false),
    [CHANGE_INPUT]: (state, action) => {
        const { name, value } = action.payload;
        return state.setIn(['write', name], value);
    },
    [RESET_INPUT]: (state) => state.set('write', initialState.get('write'))
}, initialState);
WriteMemo 컴포넌트 리덕스에 연결
리듀서를 만들었으니, 이제 WriteMemo 컴포넌트를 리덕스에 연결시키겠습니다.
src/containers/WriteMemo.js
import React, { Component } from 'react';
import { InputPlaceholder, WhiteBox } from 'components/WriteMemo';
import { InputSet, SaveButton } from 'components/Shared';
import { connect } from 'react-redux';
import { bindActionCreators } from 'redux';
import * as uiActions from 'modules/ui';

class WriteMemo extends Component {
    render() {
        return (
            <WhiteBox>
                {/*<InputPlaceholder/>*/}
                <InputSet/>
                <SaveButton/>
            </WhiteBox>
        );
    }
}

export default connect(
    (state) => ({
        focused: state.ui.getIn(['write', 'focused']),
        title: state.ui.getIn(['write', 'title']),
        body: state.ui.getIn(['write', 'body'])
    }),
    (dispatch) => ({
        UIActions: bindActionCreators(uiActions, dispatch)
    })
)(WriteMemo);
WriteMemo 포커스 주고 빼기
WriteMemo 에서 기본적으로 InputPlaceholder 를 보여주고, 이게 클릭 됐을 때 InputSet 와 SaveButton 이 보여지도록 설정하겠습니다.
포커스 설정
handleFocus 메소드를 만들어서 focused 상태가 아닐 때 FOCUS_INPUT 액션을 실행하도록 하고, 이를 WhiteBox 에 onClick 으로 연결해주세요.
렌더링 부분에서는 focused 값에 따라 다른 내용을 보여주도록 설정하세요.
src/containers/WriteMemo.js
import React, { Component } from 'react';
import { InputPlaceholder, WhiteBox } from 'components/WriteMemo';
import { InputSet, SaveButton } from 'components/Shared';
import { connect } from 'react-redux';
import { bindActionCreators } from 'redux';
import * as uiActions from 'modules/ui';
class WriteMemo extends Component {
handleFocus = () => {
const { focused, UIActions } = this.props;
// 포커스 된 상태가 아닐 때만 실행합니다.
if(!focused) {
UIActions.focusInput();
}
}
render() {
const { handleFocus } = this;
const { focused, title, body } = this.props;
return (
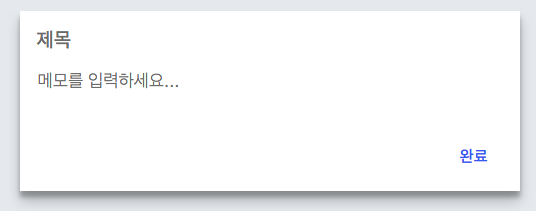
focused ? /* 포커스 된 상태 */ (
<WhiteBox>
<InputSet/>
<SaveButton/>
</WhiteBox>
) : /* 포커스 풀린 상태 */ (
<WhiteBox onClick={handleFocus}>
<InputPlaceholder/>
</WhiteBox>
)
);
}
}
export default connect(
(state) => ({
focused: state.ui.getIn(['write', 'focused']),
title: state.ui.getIn(['write', 'title']),
body: state.ui.getIn(['write', 'body'])
}),
(dispatch) => ({
UIActions: bindActionCreators(uiActions, dispatch)
})
)(WriteMemo);
포커스 해제
컴포넌트 바깥을 클릭하면 포커스가 해제되도록 설정을 하겠습니다. 이 기능을 구현하기 위해서 우리가 프로젝트를 시작 할 때에 설치 했었던 react-click-outside 를 사용하겠습니다.
src/containers/WriteMemo.js - 상단
import enhanceWithClickOutside from 'react-click-outside';
를 통하여 라이브러리를 불러오고, 컴포넌트를 내보낼 때 이를 감싸주면 됩니다.
src/containers/WriteMemo.js - 하단
export default connect(
    (state) => ({
        focused: state.ui.getIn(['write', 'focused']),
        title: state.ui.getIn(['write', 'title']),
        body: state.ui.getIn(['write', 'body'])
    }),
    (dispatch) => ({
        UIActions: bindActionCreators(uiActions, dispatch)
    })
)(enhanceWithClickOutside(WriteMemo));
그 다음에는 handleClickOutside 메소드를 선언하면 컴포넌트 밖이 클릭 되었을 때 이 메소드가 실행됩니다.
    handleClickOutside() {
        const { UIActions, focused } = this.props;

        if(focused) { // 포커스가 되어 있지 않을때만 실행한다
            UIActions.blurInput();
        }
    }
한번 전체 코드를 확인해볼까요?
src/containers/WriteMemo.js
import React, { Component } from 'react';
import { InputPlaceholder, WhiteBox } from 'components/WriteMemo';
import { InputSet, SaveButton } from 'components/Shared';
import { connect } from 'react-redux';
import { bindActionCreators } from 'redux';
import * as uiActions from 'modules/ui';
import enhanceWithClickOutside from 'react-click-outside';

class WriteMemo extends Component {
    handleFocus = () => {
        const { focused, UIActions } = this.props;

        // 포커스 된 상태가 아닐 때만 실행합니다.
        if(!focused) {
            UIActions.focusInput();
        }
    }

    handleClickOutside = () => {
        const { UIActions, focused, title, body } = this.props;

        if(focused) { // 포커스가 되어 있지 않을때만 실행한다
            if(title !== '' || body !== '') return; // 만약에 title 이나 body 가 비어있지 않다면 유지시킨다
            UIActions.blurInput();
        }
    }

    render() {
        const { handleFocus } = this;
        const { focused, title, body } = this.props;

        return (
            focused ? /* 포커스 된 상태 */ (
                <WhiteBox>
                    <InputSet/>
                    <SaveButton/>
                </WhiteBox>
            ) : /* 포커스 풀린 상태 */  (
                <WhiteBox onClick={handleFocus}>
                    <InputPlaceholder/>
                </WhiteBox>
            )
        );
    }
}

export default connect(
    (state) => ({
        focused: state.ui.getIn(['write', 'focused']),
        title: state.ui.getIn(['write', 'title']),
        body: state.ui.getIn(['write', 'body'])
    }),
    (dispatch) => ({
        UIActions: bindActionCreators(uiActions, dispatch)
    })
)(enhanceWithClickOutside(WriteMemo));
이제 한번 브라우저에서 컴포넌트를 클릭해보고 그 바깥을 다시 클릭해보세요. 포커스가 제대로 작동하나요?
인풋 리덕스에 연동하기
인풋의 값을 리덕스 상태에 연동해봅시다.handleChange 메소드를 만들어서 이벤트 정보에 따라 알맞는 값을 수정하도록 설정을 해보세요.
src/containers/WriteMemo.js - handleChange
    handleChange = (e) => {
        const { UIActions } = this.props;
        const { name, value } = e.target;

        UIActions.changeInput({name, value});
    }
그 다음엔, 이 메소드를 InputSet 컴포넌트에 전달해주고, 또 title 과 body 값도 전달하세요.
src/containers/WriteMemo.js - render
    render() {
        const { handleFocus, handleChange } = this;
        const { focused, title, body } = this.props;

        return (
            focused ? /* 포커스 된 상태 */ (
                <WhiteBox>
                    <InputSet onChange={handleChange} title={title} body={body}/>
                    <SaveButton/>
                </WhiteBox>
            ) : /* 포커스 풀린 상태 */  (
                <WhiteBox onClick={handleFocus}>
                    <InputPlaceholder/>
                </WhiteBox>
            )
        );
    }
이제 브라우저를 열어 인풋 값이 제대로 수정 되는지 테스팅 해보세요.
서버에 메모 작성하기
자, 이제 이번 튜토리얼의 본론으로 들어왔습니다. 드디어 웹 연동을 할 차례입니다.
API 호출 함수 준비하기
src/lib/web-api.js 파일을 만들어주세요. 이 파일에 우리의 REST API 들을 호출하는 함수들을 만들어서 저장할것입니다.
이번에 우리가 만들 함수는, 메모를 작성하는 함수입니다. 다음과 같이 코드를 입력해주세요.
src/lib/web-api.js
import axios from 'axios';

export const createMemo = ({title, body}) => axios.post('/memo', {title,body});
axios 는 프로미스 기반으로 웹 요청을 해주는 라이브러리입니다. 각 HTTP 메소드에 따라 내장 함수가 있습니다. 현재 우리는 POST 를 하기 때문에 axios.post 를 했습니다. 만약에 GET 의 경우엔 axios.get 을 하면 되고, DELETE 의 경우엔 axios.delete 를 하면 됩니다.
axios.post 함수의 첫번째 파라미터는 요청할 주소이고, 두번째 파라미터는 전달 할 데이터(Request Body) 입니다.
메모 생성 액션 만들기
이제 메모 생성 액션을 만들도록 하겠습니다. 메모 관련 액션들은 modules/memo.js 에서 관리합니다.
modules/memo.js
import { createAction, handleActions } from 'redux-actions';
import { Map } from 'immutable';
import * as WebAPI from 'lib/web-api';

// 액션 타입
const CREATE_MEMO = 'memo/CREATE_MEMO';

// 액션 생성자
export const createMemo = createAction(CREATE_MEMO, WebAPI.createMemo) // { title, body }

const initialState = Map({

});

export default handleActions({

}, initialState);
redux-pender 가 웹 요청 프로미스를 관리해주기 때문에 우리가 따로 해야 할 작업은 없습니다. 방금 만든 web-api.js 를 불러와서, createAction을 통하여 액션 생성자를 만드세요.
WriteMemo 에서 액션 불러오기
방금 만든 액션을 WriteMemo 컴포넌트에서 불러오고 바인딩도 해주겠습니다.
src/containers/WriteMemo.js
// (...)
import * as memoActions from 'modules/memo';


class WriteMemo extends Component {
    // (...)
}

export default connect(
    (state) => ({
        focused: state.ui.getIn(['write', 'focused']),
        title: state.ui.getIn(['write', 'title']),
        body: state.ui.getIn(['write', 'body'])
    }),
    (dispatch) => ({
        UIActions: bindActionCreators(uiActions, dispatch),
        MemoActions: bindActionCreators(memoActions, dispatch)
    })
)(enhanceWithClickOutside(WriteMemo));
작성 기능 구현하기
handleCreate 메소드를 만들어서 메모 작성 액션을 실행 한 다음에, 인풋 상태를 초기화시키세요. 이 메소드를 만들 땐 함수 앞에 async 키워드를 붙여야 합니다.
추후 이 부분에서 새 메모를 불러오는 작업도 할 것입니다. 일단은 주석만 작성해놓고 나중에 구현하겠습니다.
메소드를 만든 다음엔 이를 SaveButton 컴포넌트에 전달하세요.
src/containers/WriteMemo.js - handleCreate, render
    handleCreate = async () => {
        const { title, body, MemoActions, UIActions } = this.props;
        try {
            // 메모 생성 API 호출
            await MemoActions.createMemo({
                title, body
            });

            UIActions.resetInput();
            // TODO: 최근 메모 불러오기

        } catch(e) {
            console.log(e); // 에러 발생
        }
    }

    render() {
        const { handleFocus, handleChange, handleCreate } = this;
        const { focused, title, body } = this.props;

        return (
            focused ? /* 포커스 된 상태 */ (
                <WhiteBox>
                    <InputSet onChange={handleChange} title={title} body={body}/>
                    <SaveButton onClick={handleCreate}/>
                </WhiteBox>
            ) : /* 포커스 풀린 상태 */  (
                <WhiteBox onClick={handleFocus}>
                    <InputPlaceholder/>
                </WhiteBox>
            )
        );
    }
여기까지 하시면, 메모작성 작업이 완료됩니다.
아직 우리가 메모를 화면에 렌더링하지 않았기 때문에 제대로 작동 하는지 바로 확인 할 수는 없는데요. 한번 개발자 도구에서 Network 부분을 열고 메모 작성을 시도해서 실제로 서버에 요청을 하는지 확인해보세요.
메모 작성하는것이 끝났습니다.
이젠 메모를 불러오는것만 남았으니, 거의 절반은 한겁니다!